Hot Wheels Car
- Chloe King

- Jun 3, 2019
- 5 min read
Updated: Jun 5, 2019
The big modelling task of our second year of college was to make a 3D model of a hot wheels car we were previously given and put into Illustrator many months ago. We used that template to build our car in Maya ( I scrapped the template towards the middle) as close to the toy as possible.


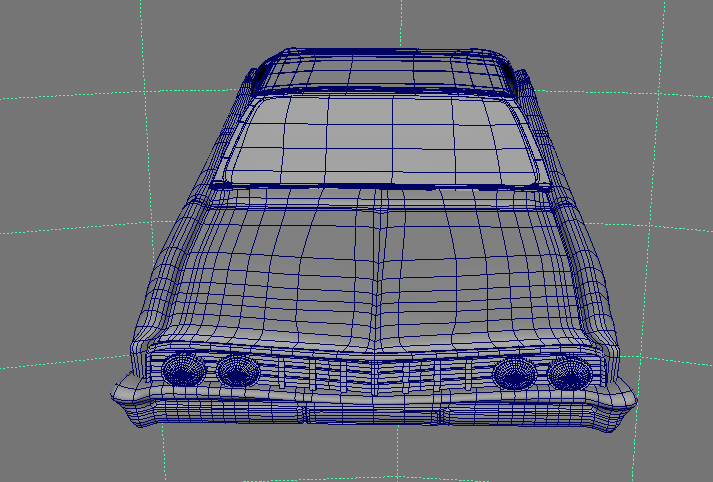
The first step we did was create a cylinder and use the flat face to create the arches over the wheels. Using the template I made I move the vertex's roughly where the arch was and did the same for the other side. I could then connect both sides by bridging them across to make the side panel. Next I extruded the panels up to make the entire side panel.


Once I had made the side panel I realized I had not other angle references so this is about when I scrapped my template and found some blueprints online. Using them I could extrude my side panel over into a curve and into the front and back panels. Originally I only did half the car and then mirrored it so there would be no mistakes on either side. When I was texturing at the very end I did a basic version without the flames so I definitely had a car ready to but I added in the flames later on.
Moving on, the next thing I did after the main body was to make the roof, using a cube and the 3 button to smooth it out proved easy up to a point. That point was the back, if it wasn't for the 3 button It would look very tragic and very sad. Using the edges I extruded in at the back to make the window area and moved the vertex's to form the pointed ends (the topology is bad but it does its job) and I then smoothed it out so I didn't have to look at the contorted edges.


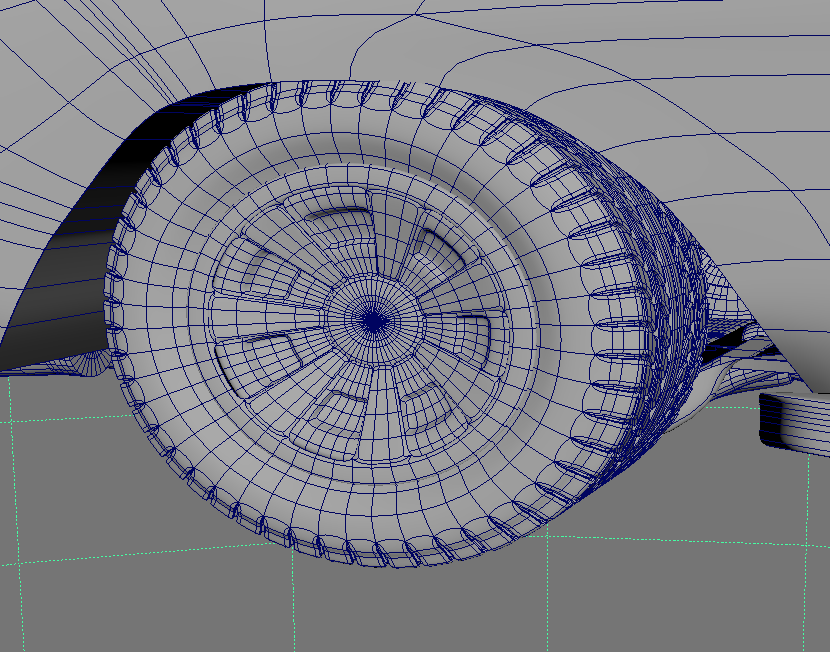
Moving on, I began to model the wheels. I used a tutorial online to model them. In the tutorial it only showed the rubber part of the tire and not he middle section so that part was up to us to make. I made the middle section in two parts, I tried doing it as one whole piece but that proved to be too difficult. I only made half of the wheel then mirrored it so both sides were symmetrical. When texturing the wheel although my hot wheels car tires are entirely black but I wanted some contrast on them so I made the middle section metal.
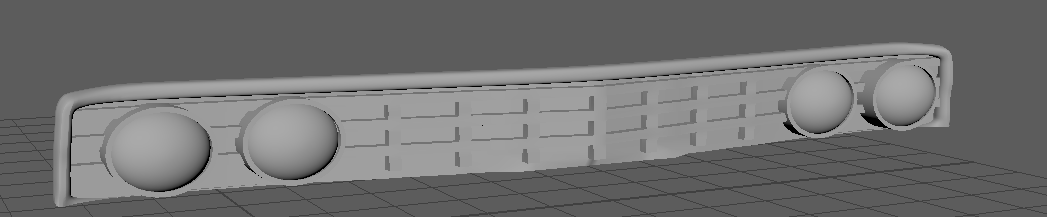


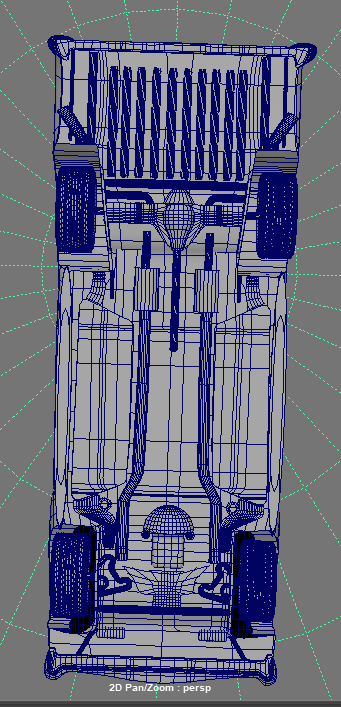
The bumpers were a nightmare to make overall, not one part was easy and went off without issues. The blueprints were different sizes and so trying to model from different angles made me end up with a deformed bumper. Its the side parts that wrap around the main body that I couldn't get right so I did have to make peace and move on. Texturing them was easy as it was only one color, I would maybe have liked to add a proper license plate. The grill was also a bit of a struggle as I had to move the vertex's so they bent with the curve of the car without looking jagged. The lights were the only part that I didn't mess up, it is a sphere and a pipe that I just placed on top of the grill.


Lastly on the exterior, the bottom of the car. Instead of cutting Into the car and extruded I made each part from scratch. There are some parts that are not exactly the same but they are very close. I did have some sizing issues along the parts where there are bumps but I managed to fit everything on fine. Halfway through making this my laptop decided to restart without warning and I hadn't saved in 10 mins so that set me back and annoyed me. Texturing once again was easy as it was all one color so that was quick and easy.


Adding on, the interior. This wasn't a part that was mandatory but I like being extra and everything needs to look good so I did it anyway. I first started with the seats, I tried to copy the seats exactly but I didn't like how basic they looked so I found a different car seat and modelled that one. Once again the interior isn't exactly the same as the hot wheels especially the back seats but I did add on more on the dashboard. Originally, the inside floor and sides of the doors were connected to the outside exterior but I realized I didn't want everything to be merged together so it could be easy to UV map and texture later on. I did debate alot on the texturing with what colors to go for, many other Chevy's I saw had bright blue and red interiors but I wanted to stick to the toy as much as possible. I went with a matte black interior with a brown leather wheel and silver accents as I didn't want everything to be too overwhelming.


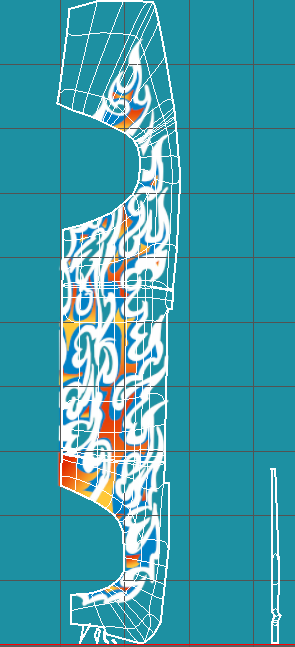

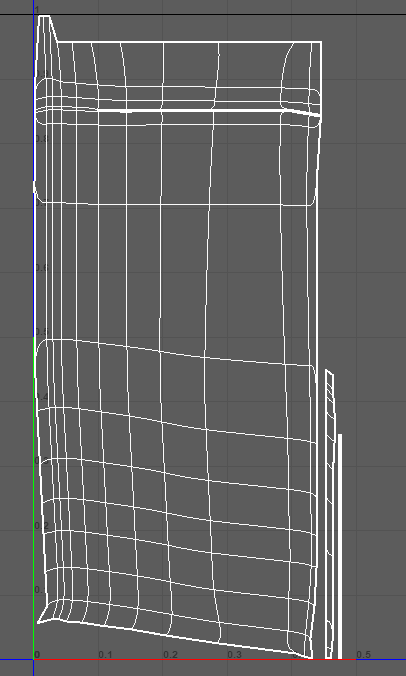

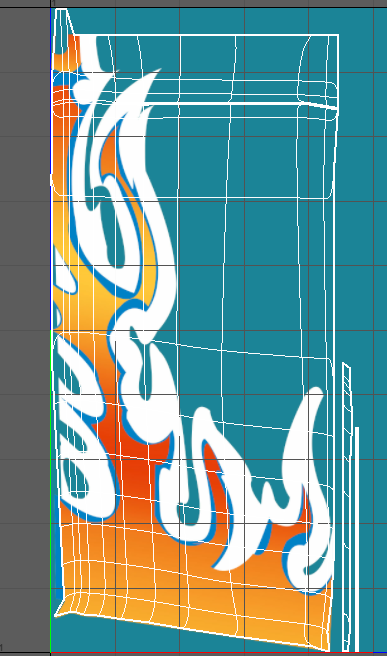
Finally, the flames and UV mapping. Even though I had textured my car I still wasn't happy without the flames. I knew it would really make the car stand out and bring it together. Thanks to Emma who's in my synoptic project she found out how to get the flames onto the car (she has a similar one) so once I had gotten the directions I set out to make the flames. First, I had to UV map the parts I needed the flames to be on, this required some extracting panels in Maya and making an automatic UV map. I then saved the picture of the UV map and put it into Photoshop where I then had to draw on the flames to fit within the lines. The side panel was easy due to my illustration piece I had done previously. Using the pen tool and the gradient I was able to draw the flames on easily.However, the flame son the front panel were a bit harder due to the curve. So I simplified it and stopped the flames where there is a dip on the car. Its not an exact replica but it is close enough. It was then just a matter of adding on the textures in Arnold and changing the settings again so there is a reflection.


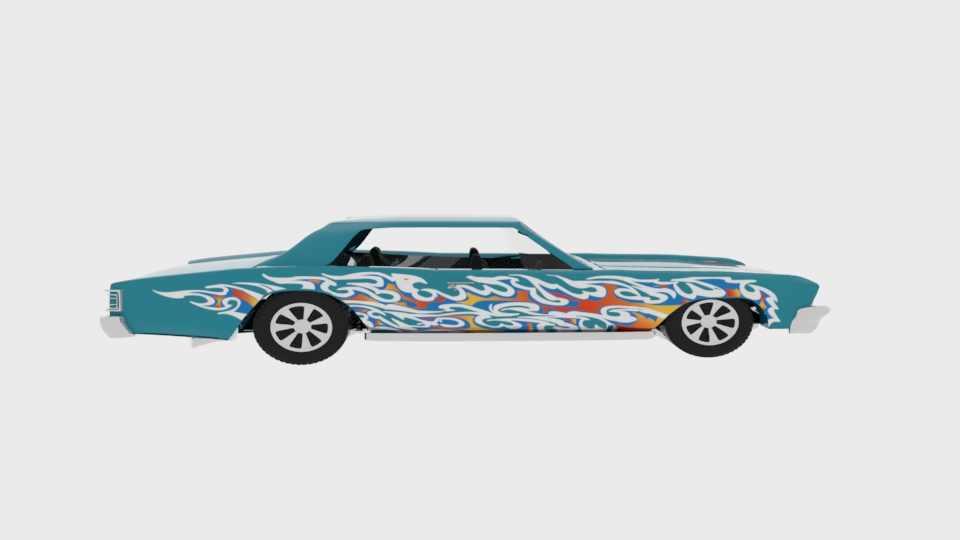


Overall I am so happy with how this turned out, minus the flames that curve up that I didn't manage to get done I don't think it could have gone better. Considering I had only started it around 3 weeks ago I am surprised at how well I have done. The main areas I struggled with was trying to extrude over from the side panel and getting the curve over onto the back end and front. The front curve still looks a bit off to me but I think the back went alot better. I also had a hard time making the roof due to its odd shape but now I know how to make it next time I'd defiantly change my tactics. The only things I would change apart from that is the bumpers by trying to get the shape as close to the hot wheels as possible. Besides those points everything else went well and I did enjoy making car as stressful as it was, but I always look forward to the outcome and I am very pleased by this one.


Comments